If this is your first visit, be sure to
check out the FAQ by clicking the
link above. You may have to register
before you can post: click the register link above to proceed. To start viewing messages,
select the forum that you want to visit from the selection below.
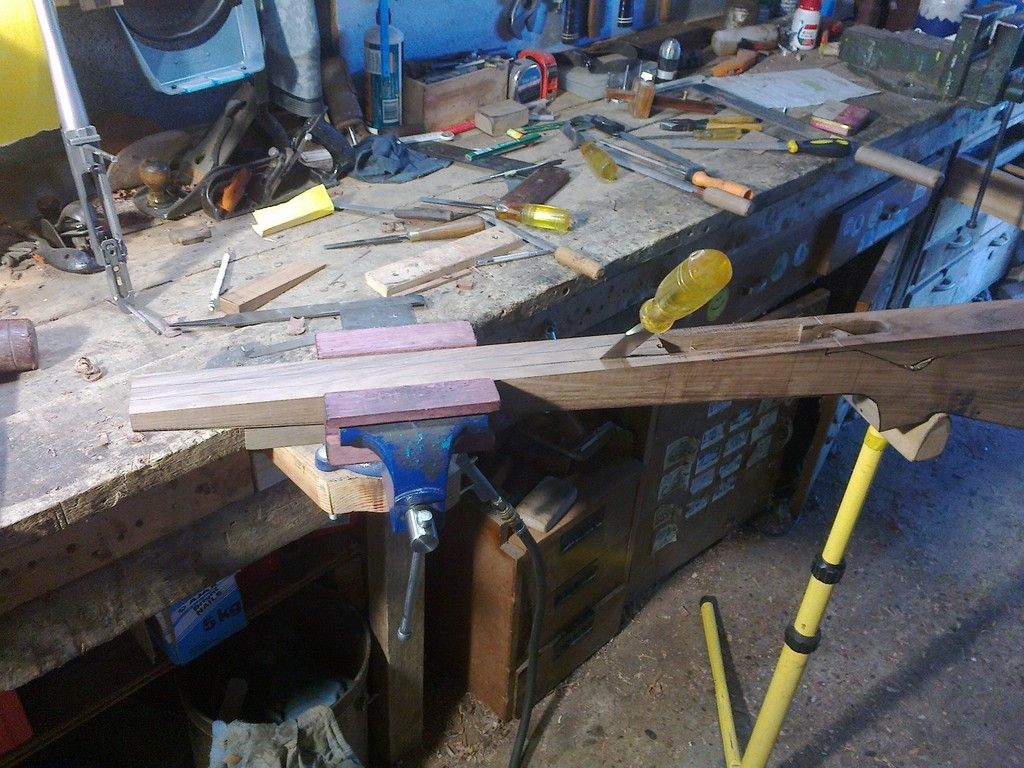
Today's little effort saw the barrel channel started, the roughing out of the mag well, the recoil lug recess cut in and the action sunk in about half way.
This sako action has a complicated undercarriage (mainly in the recoil lug area) and has been a bit of a trial to inlet especially with the full length forestock but have it sitting "in the wood" now so can look to the next page of tricks. I was very pleased that the barrel was left at 22 inches and will be cut to 20 in when I have finished with it as with an extra 2 in for the tip I had something to grip onto to get the b/a in and out of the wood. He will probably have to undo the action screws and give them a tap to slightly lift the b/a so he can get it out of the stock.
Was going to use ebony for the forend tip and the grip cap but the bits I have here, while they were right for standard sized tips( have a few grip caps made up) but needed something larger for this one. The piece I could have got was going to cost a bit much so he got a piece of African blackwood from a knifemaker here and that will have to be done soon. I will probably semi shape the forestock to get nice staright lines before attaching the tip and shaping up the Schnabel. The grip is quite large so a one off cap will have to be made for that as he wants the same dimensions as the factory stock which has a 2 x 1 1/2 cap where I usually make mine 1 3/4 x 1 1/4
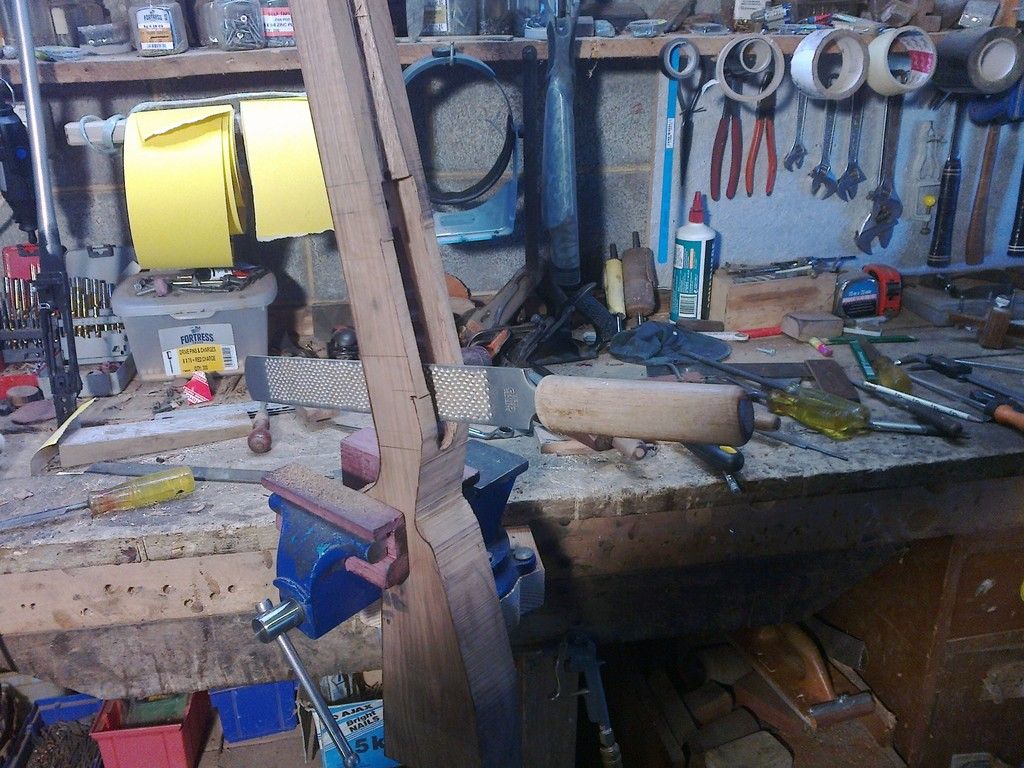
Today was a short one as I prepared the forend tip but want to preshape the forestock before I glue it on. Just taking the sides of the blank has made quite a difference to how it looks and slims it up considerably
Another short afternoon but I got the forend tip sorted out with the three 1/8 in brass dowels cut and marked every 1/4 in with the end nippers to give it a good gripping surface. The is not a great deal of room on the end of the long forestock for the dowels.
Once it is cramped into position I release the cramp and tape a 1/2 in square block onto the front face of the tip in the centre and then recramp it again. This makes sure the cramping pressure is on a small centre spot and will cramp straight back where the cramp face on its own can exert pressure on the top edge and the bottom edge can be less evenly cramped.
The guy is coming in for a look later in the day so I inlet the forend tip and gave it a preliminary shape so he can get an idea how (ugly) it will look.
This African blackwood is hard and took a lot more than I would have thought to get it into what is close to finished shape
Then it was onto the butt plate and after finding center I marked an 1/8 to the right to get the required cast
And got it settled into place
When I set the forend tip into place it was wide enough that I was able to take a slice off one side that after a little cleaning up became the grip cap. I scribed a line around the base and another around the top to guide me when I file the edge flute with a chainsaw file. Cut the little brass dowels and epoxied it into place to set overnight.
With files, scrapers, carving chisels and sandpaper and about 5 1/2 hours today I got some shape refining done. Getting palm swells and cheekpieces done are not my favourite parts of the process and in fact the last cheekpiece I did was in the late 70's and doing this one reminded me why that was so. With the depth of the stock necessitated by the hog back trying to get a neat little cheekpiece with a balance with shape, depth of the cheekpiece and the remaining wood between the bottom edge and the toe line is a bit of a juggle. It is much easier where there is no combline rise but I think I may still take a little more from the bottom edge toward the front. Anyway this is it as it sits now
Spent a little more time on the Schnabel to reduce some of the bulk and think I am about close to the finish shape now and then had a look at the grip cap. Using a home made guage I marked a line round the base
Then marked in a line round the top (?? bottom) face so I had two guiding lines to work to
Then with a rat tail file set to, to file in the first curve. I have grip caps made and in the drawer but they are smaller than the grip size that Dino wanted. I was to copy the sako stock where the grip cap is 2" x 1 1/2" where I usually make mine 1 3/4" x 1 1/4" for a slimmer grip.
When the radius is filed in right round and to both guide lines the first part is done
After which the top (??bottom) radius is filed on and a bit of sandpaper takes out the heavy file marks.
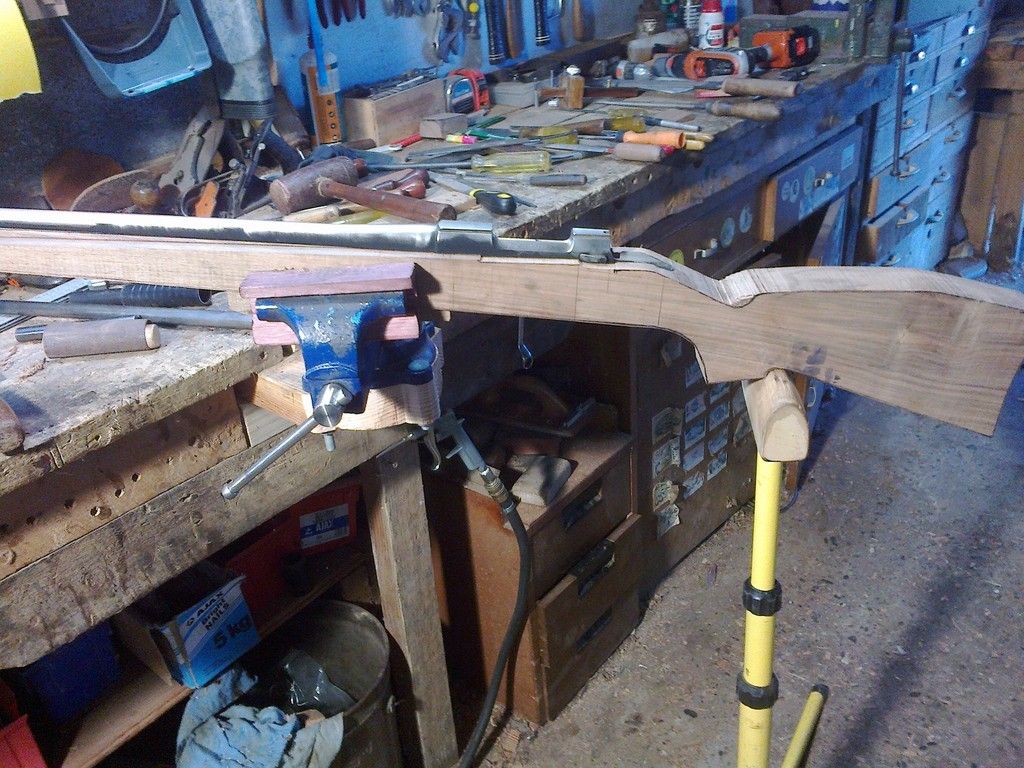
I think I have the final shape about as requested now with the Schnabel on Dino's
compared to the Sako 85 Bavarian that was the pattern
And with the cheekpiece refined a little we are just about there. The combline was taken from the sak stock suited for a scope sight and as this is to be an aperture sighted rifle I fully expect that when Dino comes down for a fitting I will be able to lower therear of the comb at least which will bring a slightly better proportion to it.
Dino has just left after a fitting session. I had bent up a couple of pieces of brass and drilled a hole for the peep at the right height above the receiver to match what he has coming and taped it and a another piece on for a front sight. I knew the combline would be way to high as it was copied from his sako stock that was suited to a scope sight so with Dino having a couple of trial shoulderings the big rasp came into play and the combline altered to suit. As I had suspected I had to take a good 1/2" of but it comes to shoulder with "sights" aligned now so bit of a sand up and slight re-shape of the cheekpiece to go, then it is back to finish sanding so I can get some oil into it. I had taken the two pieces that were cut off the sides of the forestock and gave half of one a coat of alkanet infused oil, and on the other piece gave half of it a coat of walnut stain infused oil with the ends of both pieces given a coat of plain oil. Dino could see the richness that the alkanet bought to the wood so that is what the finish will be.
Having re-shaped the cheekpiece after the fitting session and sanded through 150 and 220 grit, this morning saw it taken to 360 then wetted to raise the grain, sanded with 360, wetted and 360'd again then wetted for the third time and rubbed back with worn 360paper then 600 paper. After that the first flood coat of the alkanet oil is brushed on and left for a half hour before rubbing back with a square of old towel. I will flood it twice more before the next phase.
I am about ready to call this one finished after 22 coats of oil comprising of a couple of flood coats of alkanet infused oil, followed by a couple of 600 grit wet sands with the rest taken up by rubbed coats and finished with a tung/blo/beeswax mix.
I think it is as close to the brief as following a picture can get without a stock and a duplicator.
The colour is not the slightly washed out yellowed look that my cell camera and lack of skills to use it may show.
Dino has had the barrel shortened and sights added so he will see how the height relates to zero and go from there before deciding on the finish of the metalwork.
These are the pics he sent me
 Tweet
Tweet


Comment